“Want to set up NordVPN on BitTorrent?”
Many users may be looking for a way to do just that.
NordVPN provides dedicated P2P servers to ensure safe and secure use of torrenting software, including BitTorrent.
However, there may be cases where you want to enhance BitTorrent’s security and privacy without using the NordVPN app.
In this article, we’ll guide you through the process of setting up NordVPN with BitTorrent’s SOCKS5 proxy for a more private and secure torrenting experience.
How to Set Up NordVPN with BitTorrent’s SOCKS5 Proxy
Let’s get started with the step-by-step guide on how to set up NordVPN with BitTorrent’s SOCKS5 proxy.
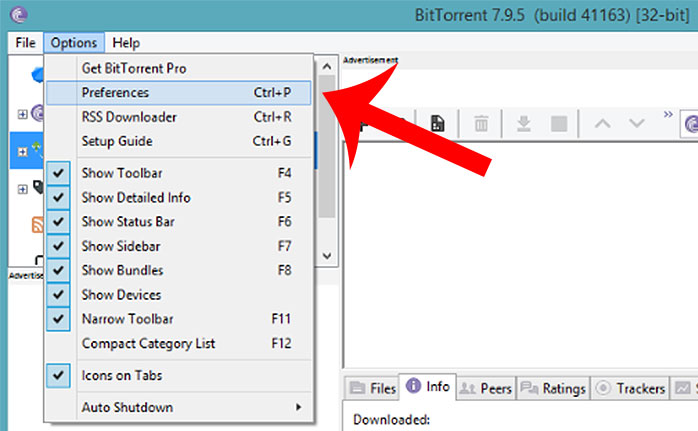
Open BitTorrent Preferences
After launching BitTorrent, tap on the top menu “Options” → “Preferences” in sequence.
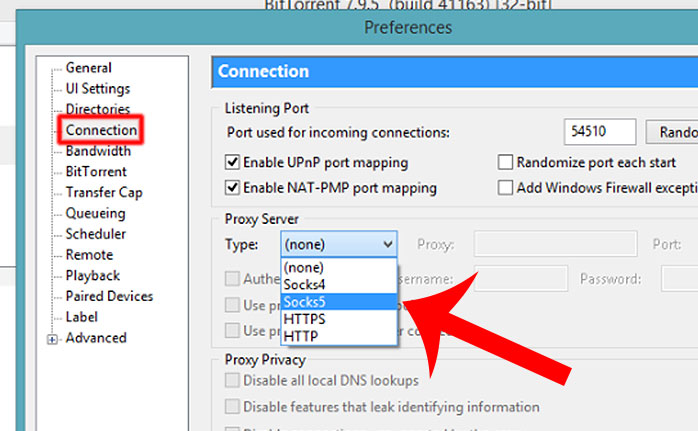
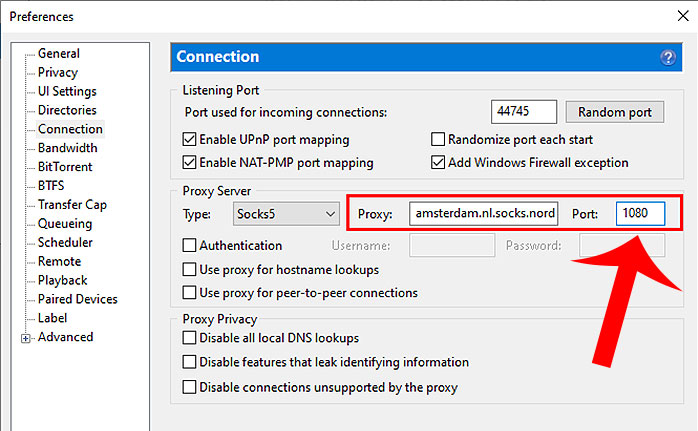
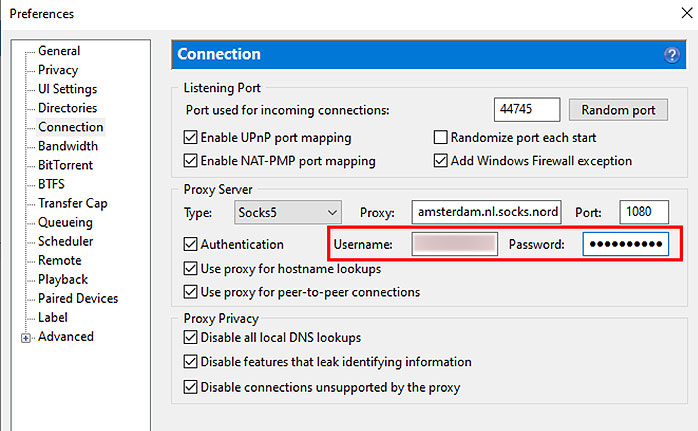
Change the proxy server to Socks5.
Click “Connection” from the left menu.
Change the “Proxy Server” Type to “Socks5.”
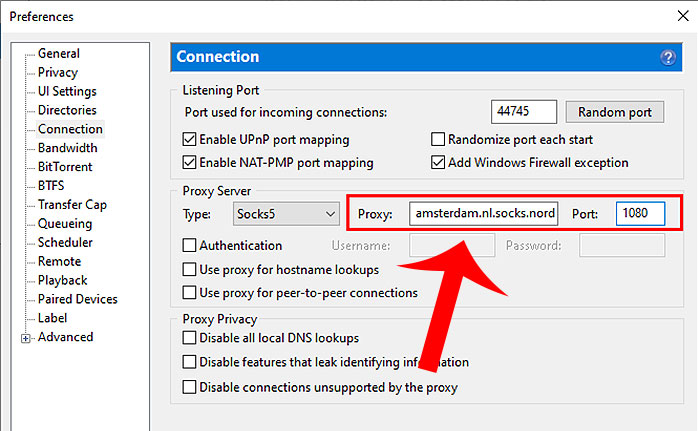
Enter the proxy server address.
Enter a single proxy server address in the Proxy input field.
If unsure, you can enter “amsterdam.nl.socks.nordhold.net”.
The available proxy server addresses are as follows:
amsterdam.nl.socks.nordhold.net
atlanta.us.socks.nordhold.net
dallas.us.socks.nordhold.net
los-angeles.us.socks.nordhold.net
nl .socks.nordhold.net
se.socks.nordhold.net
Stockholm.se.socks.nordhold.net
us.socks.nordhold.net
new-york.us.socks.nordhold.netSet the port to 1080.
Enter “1080” in the “Port” field.
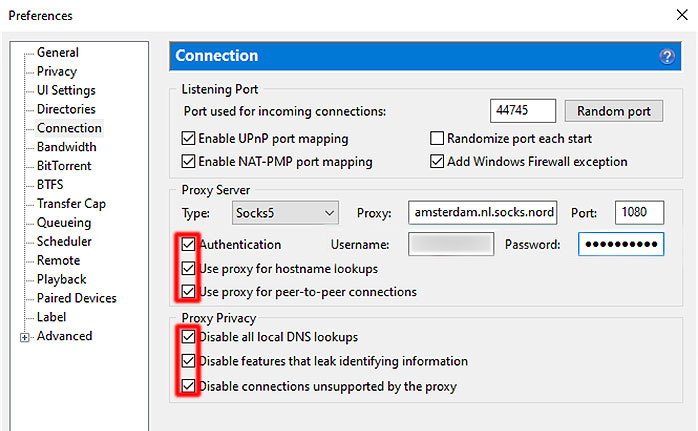
Check the relevant options.
Check the following options:「Authentication」「Use proxy for hostname lookups」「Use proxy for peer-to-peer connections」「Disable all local DNS lookups」「Disable features that leak identifying information」「Disable connections unsupported by the proxy」
Log in to your NordVPN account.
Next, check your NordVPN service credentials.
Access the NordVPN official website and click “Log in”.

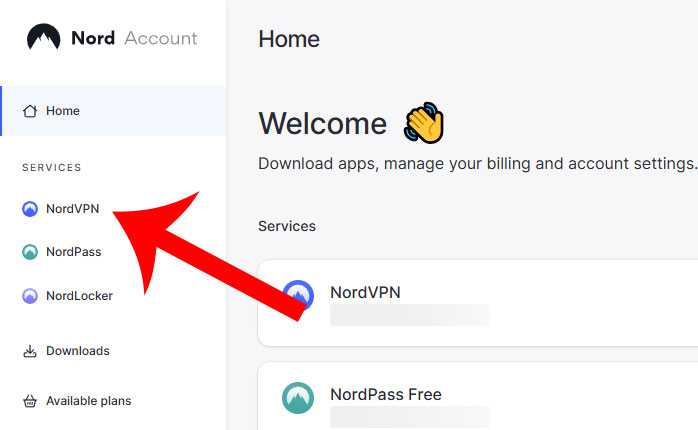
Open the NordVPN settings screen.
Click “NordVPN” from the left menu.
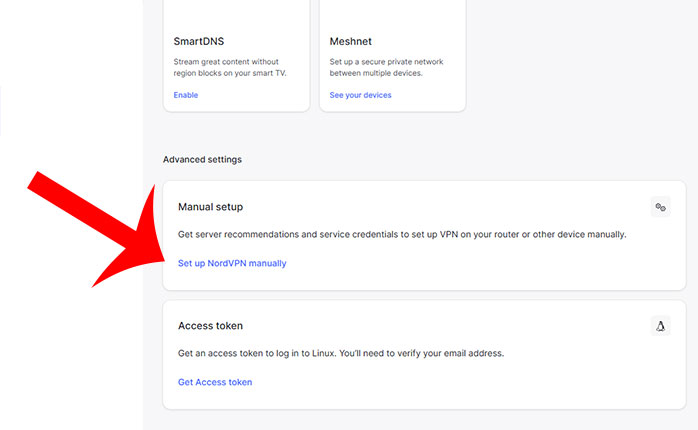
Go to the manual setup section of NordVPN.
Scroll down to find the manual setup section.
When the message “Manual setup” appears, click “Set up NordVPN manually”.
Check the service credentials.
In the service credentials (manual setup) section, you will see the “Username” and “Password”.
Click the copy icon next to them to copy the information.

Copy and paste the NordVPN service credentials.
Copy and paste the NordVPN service credentials into the “Username” and “Password” fields under the Proxy Server section.
Finally, click “Apply” and then “OK” to complete the setup.
How to Check if the Proxy Settings are Working
Now, let’s go through the steps to verify whether NordVPN has been correctly configured for BitTorrent.
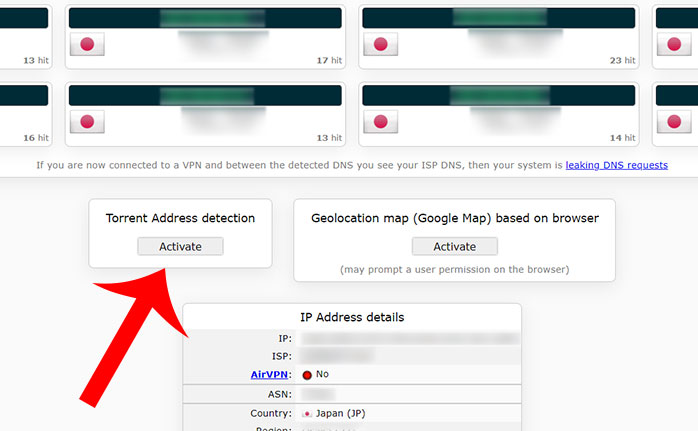
Detecting Your Torrent Address
First, access ipleak.net
Scroll down and click “Activate” in the Torrent Address Detection section.
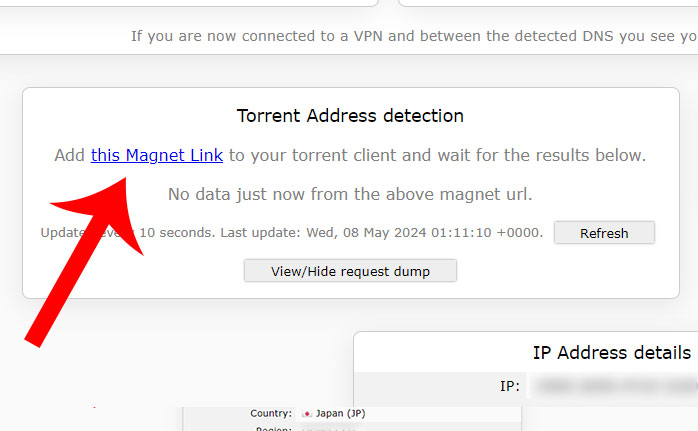
Click the magnet link.
Click “this Magnet Link”.
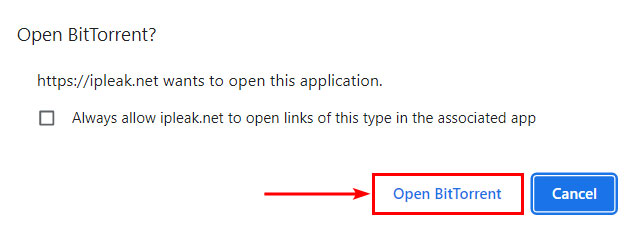
Open BitTorrent.
The message “Open BitTorrent? https://ipleak.net wants to open this application” will appear.
Click “Open BitTorrent”.
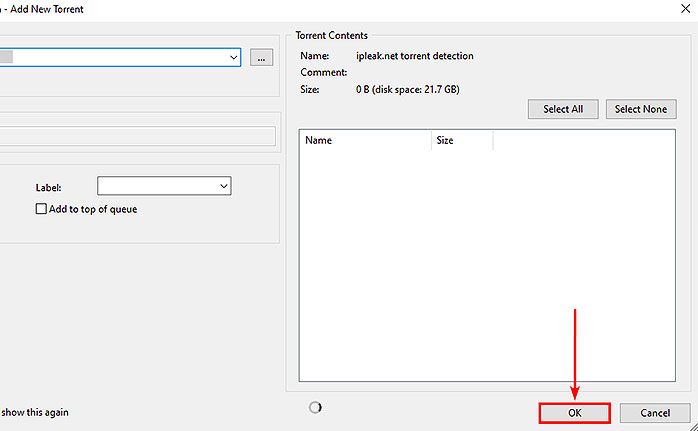
Add the Torrent
BitTorrent will launch. Click “OK” to add the torrent.
※ Keep the ipleak.net page open.
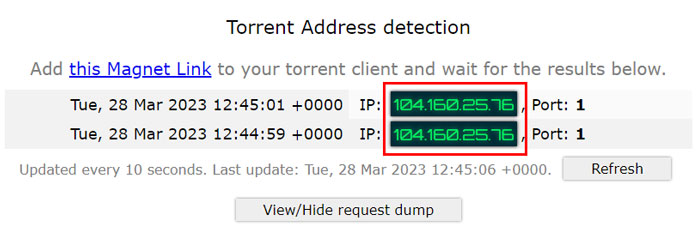
Check the Displayed IP Address
The torrent will now download metadata.
Keep the ipleak.net page open and verify that an IP address appears in the Torrent Address Detection section.
Conclusion
This guide explained how to set up NordVPN as a SOCKS5 proxy for BitTorrent.
When using BitTorrent, it is recommended to use a VPN to enhance security and protect your privacy.
With NordVPN, you can prevent your IP address from being exposed.

BitTorrent is a convenient system for transferring large amounts of data.
However, due to its nature, connected users can see each other’s IP addresses, which poses a privacy risk.
By setting up NordVPN on BitTorrent, you can prevent your real IP address from being exposed to others.